Accelerate Your Workflow: Mastering Product Photo Editing Techniques
- Jul 06, 2023
- 961

In today's digital age, product photography plays a crucial role in capturing the attention of potential customers. However, shooting and editing product photos can be time-consuming and tedious without the right tools and techniques. This article aims to guide you through the process of product photo editing, empowering you to speed up your workflow and produce stunning visuals that showcase your products effectively. We will also explore the efficient use of the background removal and changing tool, Imgbg.net, to enhance your editing capabilities.
1. The Importance of Product Photo Editing
Product photo editing is essential for e-commerce businesses and anyone looking to market their products effectively. It allows you to create visually appealing images that convey professionalism, highlight product details, and engage potential customers. By investing time and effort into product photo editing, you can significantly enhance the overall appearance of your products, thereby boosting your sales and customer conversion rates.

2. Shooting Techniques for Efficient Editing
Capturing high-quality product images from the start is crucial to streamline your editing process and save valuable time. Here are some shooting techniques that will help you achieve efficient editing:
-
Lighting: Proper lighting is the foundation of any great product photo. It's essential to have consistent and well-balanced lighting to accurately represent the colors and details of your products. Natural light can produce excellent results, so consider shooting near a window or outdoors. If natural light is not available or consistent, invest in artificial lighting equipment such as softboxes or light tents to achieve a controlled and even lighting setup.

-
Background: The background plays a significant role in product photography. Opt for a clean and clutter-free background that allows your product to take center stage. A plain white background is a popular choice as it provides a clean and professional look. Alternatively, you can use colored backdrops or textured surfaces that complement your product's aesthetics. Avoid busy or distracting backgrounds that divert attention from the main subject.
-
Composition: A well-composed image can make a significant impact on the viewer. Experiment with different angles, perspectives, and product placements to create visually appealing compositions. Consider the rule of thirds, leading lines, and negative space to add depth and interest to your photos. Try capturing different product variations, close-up shots of unique features, or lifestyle shots that showcase your product in context.
-
Tripod and Remote Shutter Release: Using a tripod and a remote shutter release can greatly improve the sharpness and stability of your product photos. A tripod eliminates camera shake, resulting in sharper images, while a remote shutter release allows you to trigger the camera without physically touching it. This setup ensures consistent framing and minimizes the risk of blurriness, especially when using longer exposure times or capturing multiple shots for focus stacking.
-
Product Styling: Pay attention to the presentation and arrangement of your products. Consider using props, complementary accessories, or lifestyle elements to create an appealing visual story around your product. Ensure that the product is clean, polished, and free from any imperfections or dust. Proper product styling not only enhances the overall aesthetics but also reduces the amount of time spent on post-processing.
-
Multiple Angles and Details: To provide a comprehensive view of your product, capture multiple angles and close-up shots of important details. This allows customers to get a better understanding of the product's features and craftsmanship. Highlight unique selling points, textures, intricate designs, or any other distinctive aspects that make your product stand out. By capturing a variety of shots during the shooting process, you can save time by choosing the best images during the editing phase.
Remember, investing time and effort in capturing high-quality images will significantly reduce the editing workload and yield better results. By implementing these shooting techniques, you can streamline your workflow and have a solid foundation for the subsequent editing process.
3. Streamlining the Editing Process
Efficient editing techniques can help you save time and streamline your workflow, allowing you to focus on other aspects of your business. Here are some strategies to optimize your product photo editing process:
3.1 Organization and File Management:
Establish a systematic approach to organize your files. Create a dedicated folder structure with clear labeling for each product or project. This ensures easy access to specific images during editing and avoids confusion. Additionally, consider using file naming conventions that include relevant information such as product name, variant, and shooting date. This will make it easier to locate and sort images later.
3.2 Batch Editing:
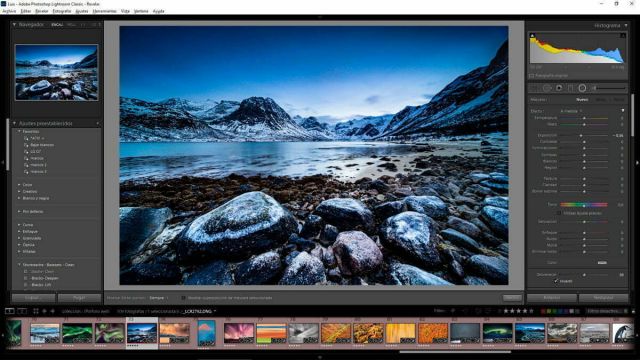
When working with a series of similar products or product variations, batch editing can be a real time-saver. Software like Adobe Lightroom allows you to apply consistent adjustments, such as exposure, white balance, and color correction, to a group of images simultaneously. This maintains a cohesive look across your product catalog while significantly reducing editing time.
3.3 Presets and Templates:
Develop your own editing presets or make use of pre-made templates to speed up your editing process. Presets are preconfigured settings that can be applied to images with a single click. They allow you to quickly achieve a specific look or style across multiple photos. Templates, on the other hand, provide a starting point for editing, including prearranged adjustment layers, filters, and effects. Customize and save your own presets and templates to maintain consistency and efficiency in your editing workflow.
3.4 Use Keyboard Shortcuts:
Familiarize yourself with keyboard shortcuts in your editing software to perform actions quickly. Shortcuts for common tasks like cropping, rotating, zooming, or applying specific adjustments can significantly speed up your workflow. Take the time to learn and practice these shortcuts, as they will become second nature over time.
3.5 Non-Destructive Editing:
Work in a non-destructive editing workflow by using software that supports layers and adjustment layers. This allows you to make changes to specific elements of an image without altering the original file. Non-destructive editing preserves the flexibility to revert or fine-tune adjustments at any stage, saving you time by avoiding repetitive edits.
3.6 Imgbg.net for Background Removal and Change:
Background removal and changing are frequently required in product photo editing. Imgbg.net is a recommended tool that simplifies this process. Here's how you can use it to speed up your workflow:
a. Upload your product photo to Imgbg.net.
b. Select the desired option for background removal or change.
c. Apply the tool's advanced algorithms to automatically remove or replace the background.
d. Download the edited image and integrate it into your editing software for further adjustments and enhancements.

3.7 Collaboration and Outsourcing:
If your workload becomes overwhelming, consider collaborating with a team or outsourcing some of the editing tasks. There are professional photo editing services available that specialize in product photo retouching. Delegating some of the editing work can free up your time and allow you to focus on other aspects of your business.
By implementing these strategies, you can streamline your editing process, reduce the time spent on repetitive tasks, and ensure consistency in your final product images. Experiment with different techniques and tools to find the ones that best suit your workflow and help you achieve optimal results efficiently.

4. Final Touches and Exporting
After completing the editing process, it's time to add the final touches to your product photos and prepare them for various platforms. Here are some important considerations for the final stages of your workflow:
4.1 Retouching and Fine-Tuning:
- Spend time on detailed retouching to perfect your product images. Remove any remaining imperfections, such as dust, scratches, or unwanted reflections. Use cloning or healing tools to fix any distracting elements or blemishes. Pay attention to small details, such as ensuring straight lines or correcting perspective distortion. Additionally, adjust colors, contrast, and saturation to achieve a visually appealing and accurate representation of your products.
4.2 Consistency and Cohesion:
- Maintain consistency in the editing style across your product catalog. This helps create a cohesive brand identity and enhances the overall visual appeal. Ensure that the colors, lighting, and overall aesthetic remain consistent throughout your images. Applying the presets or templates mentioned earlier can help achieve this consistency efficiently.
4. 3 Image Resizing and Optimization:
- Optimize your product images for different platforms and devices. Start by resizing the images to appropriate dimensions for their intended use. Consider the aspect ratios required for website galleries, social media platforms, or product listings. This ensures that your images display correctly and load quickly, providing a positive user experience. Additionally, compress the images to reduce file size while maintaining an acceptable level of image quality. This helps improve website loading times and minimizes bandwidth usage.
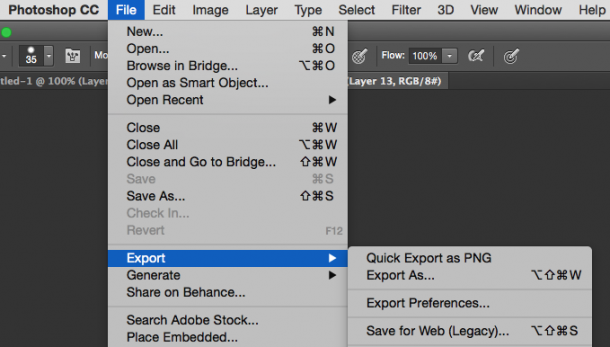
4.4 Choosing the Right File Format:
- Selecting the appropriate file format for your product images is crucial. The most common formats for web use are JPEG and PNG. JPEG is suitable for high-quality images with smaller file sizes, while PNG is preferred for images with transparency or sharp edges. Evaluate the specific requirements of the platforms you will be using and export your images accordingly.
4.5 Watermarking and Copyright Protection:
- If desired, consider adding a discreet watermark to your product photos to protect them from unauthorized use. Watermarks can include your logo, website URL, or copyright symbol. Ensure that the watermark does not detract from the product itself and remains unobtrusive. Furthermore, consider registering your images for copyright protection to establish legal ownership and protect against infringement.
4.6 Saving and Backup:
- Always make backups of your edited images to ensure their safety. Create duplicate copies on external hard drives, cloud storage, or other reliable backup solutions. It's also a good practice to maintain an organized archive of your original unedited images, as these can be useful for future reference or potential re-edits.
4.7 Quality Control and Proofing:
- Before publishing or distributing your product images, perform a thorough quality control check. Review each image to ensure that it meets your desired standards in terms of sharpness, color accuracy, and overall appearance. Pay attention to details like proper alignment, consistent cropping, and any last-minute adjustments needed. It can be helpful to have a second pair of eyes to review your work and provide feedback
By paying attention to the final touches and effectively exporting your product images, you can present your products in the best possible light. Implementing retouching techniques, maintaining consistency, optimizing for different platforms, and taking necessary steps to protect your work will contribute to a professional and visually appealing presentation. Remember to save backups of your edited images and perform thorough quality control checks before sharing or publishing them. With these final steps, you can confidently showcase your products and make a lasting impression on your target audience.
Mastering product photo editing techniques is essential to streamline your workflow and create visually captivating images that entice customers. By implementing efficient shooting techniques, utilizing time-saving editing methods, and leveraging tools like Imgbg.net for background removal and change, you can significantly enhance your productivity and produce high-quality product photos. Invest time in perfecting your editing skills, and the results will speak for themselves in increased sales and